When you think about water, you might picture a refreshing glass on a hot day or the gurgling sound of a stream in the woods. But have you ever considered where all that water comes from? For many people, it’s from their own water well, a crucial source for drinking, irrigation, and even personal use. Understanding the ins and outs of water well drilling is essential if you’re thinking about getting one installed. This guide will walk you through everything you need to know. From exploring different drilling methods and costs to planning your project thoughtfully. With the right information at your fingertips, you’ll be better equipped to make informed decisions about this vital resource. So let’s dive in!
Water well drilling involves creating a borehole in the ground to access underground water resources. It is essential to understand the different drilling methods available, the importance of site assessment, and the necessary permits, as these factors significantly influence the efficiency, safety, and success of the drilling project. For more detailed information and guidance, refer to our comprehensive blog on water well drilling techniques and best practices.
Types of Water Wells
Water wells come in various forms, each uniquely designed based on factors like depth, soil composition, and intended use. By familiarizing yourself with these options, you can confidently select the well that best meets your requirements.
Dug Wells
Dug wells represent the most traditional approach to sourcing groundwater. These wells are generally excavated by hand or machinery to create a shallow opening, typically around 10 to 30 feet deep. While dug wells are often more affordable to construct, their shallower depth makes them vulnerable to contamination from surface runoff, chemicals, and other pollutants, especially during heavy rain. It’s crucial to monitor water quality regularly and implement protective measures when opting for this type of well.
Despite their susceptibility, there is something charming about dug wells. A connection to historical methods of water access that has endured through generations. Their construction speaks to a simpler time, evoking images of farmers laboring under the sun.
Driven Wells
Next up are driven wells, which involve driving a slender pipe directly into the ground. This method is particularly effective in regions with loose, sandy soil. Driven wells can typically reach depths of 25 to 50 feet and provide better water quality than dug wells due to their deeper access to groundwater reserves. However, they still have limitations regarding depth and potential sediment deposits over time. As with dug wells, regular testing for contaminants is essential to ensure clean drinking water.
What’s worth mentioning is how quickly driven wells can be installed compared to other types. If you find yourself in a hurry for immediate water access. Perhaps due to a new construction project or an unexpected drought—a driven well might just be your solution.
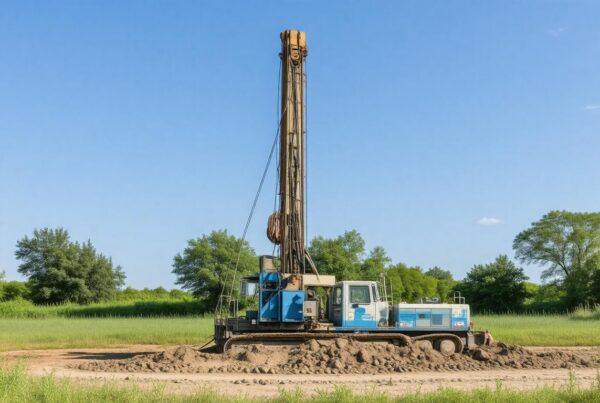
Drilled Wells
Finally, we arrive at drilled wells. The powerhouse in the realm of groundwater extraction. Created using specialized rotary drilling machines, these wells can penetrate great depths ranging from a few hundred to several thousand feet beneath the earth’s surface. The depth not only maximizes yield but also significantly improves water quality since it minimizes contact with surface contaminants.
Because of their reliability and efficiency, drilled wells are often the go-to choice for municipalities and industries needing consistent and clean water supply. However, this reliability comes at a cost—drilled wells are typically the most expensive option available.
For instance, a residential drilled well might range from 100 to 500 feet deep based on regional geology and individual needs. Notably, while the upfront investment may seem daunting, homeowners should view it as a long-term asset that will serve their family or business reliably for years ahead.
With a clear understanding of the different types of water wells and their characteristics, exploring the next steps involved in executing a successful well project becomes essential for anyone considering this vital resource.
Planning Your Water Well Drilling Project
Assessing your daily water requirements isn’t just a matter of preference; it’s about planning for both current and future needs. Begin by evaluating the demand of all users, whether it’s just your household, livestock, or even agricultural irrigation. Each of these aspects can significantly affect how much water you’ll require.
For instance, a family of four typically needs between 300-400 gallons of water per day. If you have plans to expand your family or introduce more animals onto your property, it’s wise to prepare for increased consumption. Consider not just what you need now but also how your situation may evolve because choosing a well that cannot sustain future growth means you’ll inevitably face challenges later on.
Once you’ve established your water needs, the next logical step is to understand local regulations surrounding well drilling.
Step II – Consult Local Regulations
Every region comes with its own set of rules and regulations regarding water wells, and it’s essential to familiarize yourself with these guidelines before moving forward. Local zoning laws dictate where wells can be drilled and under what conditions.
Additionally, understanding water rights is critical; they define who owns the groundwater in your area and can impact your ability to access and utilize this invaluable resource. Some municipalities require permits for well construction, which usually involves inspections to ensure compliance with safety and environmental standards. Neglecting to adhere to these regulations can lead to penalties or even disqualify you from obtaining a permit altogether.
After you’ve navigated through legalities, it’s time to focus on finding the ideal location for your well.
Step III – Site Selection
The process of selecting a site for your well is both an art and a science. As Jimmy Stevens from Stevens Drilling emphasizes, “Choosing the right spot for your well is crucial. A poor location can lead to dry wells or contaminated water.” Thus, the position of your well must be thoughtfully considered. Away from potential contamination sources such as septic systems or chemical storage while still being conveniently located near existing plumbing in your home.
Conduct thorough assessments of soil types as well; sandy soils can often yield higher water flow rates than clay soils. It’s also recommended that you consider topographical features: areas at higher elevations might naturally allow for easier drainage away from waste sources.
By carefully preparing your water needs, understanding regulations, and strategically selecting a site, you’re laying essential groundwork for the next steps in ensuring a successful drilling project.
Key Steps in the Drilling Process
The well drilling process is not just about getting equipment on-site and boring a hole; there are critical steps that lay the foundation for a successful water well installation. A combination of specialized equipment, skilled labor, and detailed planning must come together for the best results.
Step I – Site Preparation
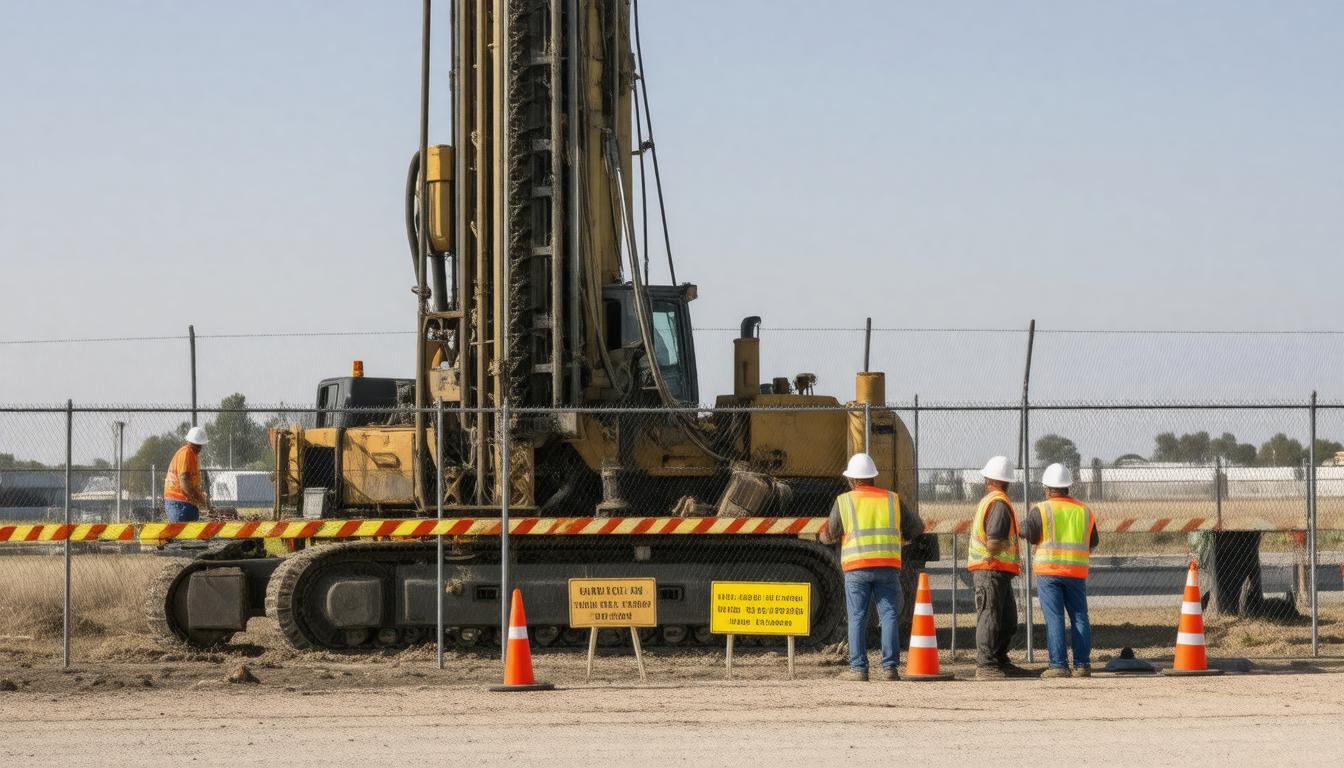
Before any drilling takes place, preparing the site is crucial. This means more than just finding the right spot; it involves clearing the area of obstacles like rocks, trees, or debris that could hinder the drilling process. It’s also necessary to level the ground to provide a stable base for the drilling rig. Establishing safety barriers around the work area not only protects workers but ensures that machinery operates safely without interference from curious passersby or pets. Preparing a clean site allows for a more focused and safe drilling experience, minimizing delays due to unexpected obstructions.
With everything in place, you can now proceed to drilling, which is where the real action begins.
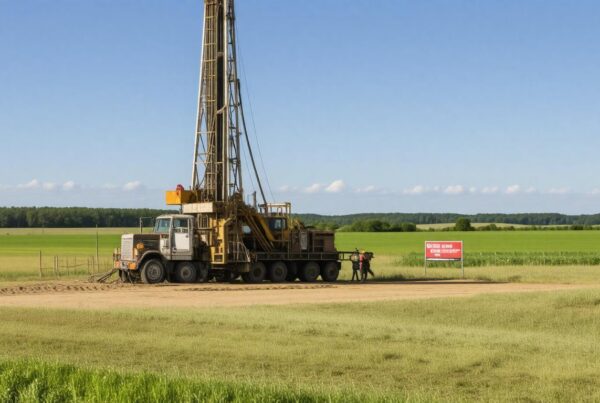
Step II – Drilling
Once the site preparation is complete, it’s time to bring in the drilling rig. The rig will bore into the ground until it reaches your desired depth, determined based on factors including soil composition and local water table levels. This part of the process can take anywhere from several hours to multiple days depending on how difficult the terrain is. For example, if you’re dealing with rocky ground, expect it to move substantially slower than when drilling through sandy soil, which provides much less friction and resistance. The intricacies of each geological layer also come into play here; knowing what’s beneath can make your project significantly smoother.
After reaching your desired depth, it’s essential to ensure stability within your newly created borehole.
Step III – Installing Casing
The next step involves inserting a casing into the borehole once drilling is completed. Usually made of steel or PVC, this casing serves a dual purpose: it stabilizes the drilled shaft and prevents water contaminants from seeping into your fresh supply. Think of it like setting a sleeve in a hole; without it, the walls might shift over time due to soil movement or erosion. Proper installation of casing cannot be overstated. It’s vital for ensuring long-term durability and purity of your water source. Any oversight during this step could compromise your entire well project down the line.
With a properly secured casing, it’s time to make sure your well is fully developed and capable of delivering clean water.
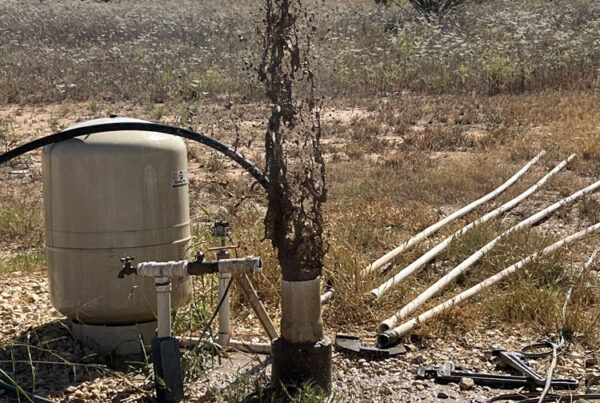
Step IV – Well Development
After installing the casing, the last step before your well becomes operational is well development. This involves pumping out any water trapped in the system along with debris left over from drilling. This crucial step not only clears out unwanted material but also promotes better flow rates by establishing clearer pathways for water movement. Developing your well may take several hours or even days depending on various factors like how much debris needs to be cleared and how fast you want your flow rate to improve. Ensuring that this step is done thoroughly guarantees access to clean and safe water right away rather than having unpleasant surprises later.
Having clearly outlined these key steps—site preparation, drilling, casing installation, and well development. You can see how they interconnect seamlessly within the overall process. Next, we will explore specific financial considerations that come into play during this essential project.
Cost Breakdown and Estimates
The cost of drilling a water well is influenced by various factors, including depth, location, and the type of well you’re looking to install. When approaching this investment, it’s essential to have a solid grasp of the different components that contribute to the overall cost.
Initial Costs
The initial costs of drilling a well encompass several necessary expenses. First comes obtaining permits and ensuring that your site is properly prepared for the drilling process. These preparations can be critical as they often dictate how smoothly drilling will progress.
For instance, the actual drilling fees typically range between $15 and $30 per foot for residential wells, depending on local market conditions and regulations.
If you decide to opt for a more sophisticated system like geothermal wells or deeper aquifers, costs can escalate even further. Additionally, remote locations may incur higher mobilization fees for equipment transport, making it vital to consider your particular circumstances when budgeting.
But initial costs are only part of the equation; there are also ongoing expenses to keep in mind.
Long-term Costs
Long-term costs come into play once the well has been drilled. These include maintenance, repairs, and electricity needed for pumping water. While these may not seem significant at first glance, they can add up over time.
It’s essential to set aside an annual maintenance budget; typical maintenance costs range between $150 and $300 each year. This recurring accountability ensures that your well continues functioning efficiently and reliably, especially as wear and tear accumulate or natural elements affect its operation.
Each of these long-term expenses needs careful planning, as neglecting them could lead you back to square one with much higher unforeseen repair costs.
If you’re looking at a comprehensive cost estimate for the entire project—the initial setup plus ongoing expenses—you might find figures ranging from $3,000 to $15,000 depending on all previously mentioned variables.
Understanding these financial aspects arms homeowners with the knowledge to make informed decisions. From choosing a reputable contractor like Stevens Drilling, who has been serving the Texas Hill Country since 1968, to establishing a sustainable budget for both initial and ongoing expenses, this foresight can lead you to enjoy reliable water access without being caught off-guard by unexpected costs later on.
With a clear understanding of costs established, it’s crucial to explore what comes next in maintaining that investment effectively and ensuring longevity. Your journey towards hassle-free water supply continues with practical strategies aimed at upkeep and operational efficiency.
Installation and Maintenance Tips
When installing a water well, consider that the wellhead should be situated at least 12 inches above ground level. This elevation is crucial as it helps prevent roof runoff and surface water from contaminating your water supply. The last thing you want is for rainwater, which can carry pollutants, to seep back into your well.
In addition to elevation, sealing the well cap is just as important. Properly securing the cap keeps out pests like insects and prevents debris from entering, both of which can impact the quality and safety of your water.
“The quality of your drinking water begins at the source—your well.”
As vital as installation is, regular maintenance becomes an ongoing commitment that ensures long-term functionality. Just like how our vehicles require routine checks, your well needs attention too. Conducting regular inspections should become part of your annual checklist. Look for cracks or damages in the casing; these tiny imperfections could let harmful contaminants infiltrate your water supply unnoticed.
In addition to physical inspections, monitoring the quality of your water remotely connects you to its health.
Testing your water quality each year is an essential part of maintenance. Comprehensive tests should include checking for common contaminants such as bacteria, nitrates, and other potentially harmful pollutants. This practice isn’t just about maintenance; it’s about ensuring that you and your loved ones are safe from possible health hazards.
In fact, many local health departments offer testing kits at low or no cost, making it easier than ever to keep tabs on what you’re drinking.
Another important aspect of maintaining your well system is pump care. Regular maintenance of your pump every 3-5 years can significantly prolong its life span and efficiency. During these check-ups, a technician can identify issues before they escalate into costly repairs.
By proactively addressing potential problems, you take control of your well’s integrity and provide peace of mind for you and your family.
With these installation and maintenance tips in mind, you’re better prepared to enhance the longevity and reliability of your water supply system while ensuring safety for all who depend on it. Now let’s pivot toward understanding essential measures that protect you during this process.
Safety Precautions in Water Well Drilling
Safety in well drilling is paramount; therefore, you must follow certain guidelines to ensure a safe and effective project. The dynamics of well drilling come with their own set of challenges that require vigilance and adherence to established protocols to protect everyone involved.
Personal Protective Equipment (PPE)
Workers should always wear appropriate PPE, including helmets, eye protection, and steel-toed boots. Each piece of equipment serves a distinct purpose. Helmets safeguard against falling debris, eye protection shields against dust and flying objects, and steel-toed boots provide crucial foot protection against heavy machinery. However, PPE alone isn’t enough—it’s merely the first line of defense.
Safety Training
Ensure that all workers have undergone safety training specific to water well drilling. This includes understanding the mechanical operation of drilling equipment and emergency procedures. Training enables crew members to recognize potential hazards before they escalate into accidents. It also covers essential topics like recognizing signs of equipment failure or operational inefficiencies. The combination of proper training and awareness can be as invaluable as the equipment itself.
Therefore, with your personnel equipped for both safety gear and knowledge, your focus should now shift to environmental concerns surrounding well drilling.
Environmental Concerns
Be mindful of the environmental impact of drilling. Spills or leaks can contaminate groundwater, but proper site preparation and using eco-friendly lubricants can mitigate these risks. Before commencing any drilling, conduct an environmental assessment to understand the local ecosystem’s vulnerabilities. This proactive step not only preserves natural resources but also fosters trust with the community being served.
In summary, when executing a well drilling project, remember that safety measures extend beyond personal protective equipment and training; they encompass environmental stewardship as well. When all these elements come together harmoniously, it sets the stage for a successful operation that protects employees, communities, and natural resources alike.
Furthermore, embodying these principles not only ensures safety on-site but also strengthens relationships with those impacted by these vital water access projects.