When you think about water, it’s easy to take it for granted—it’s just there, flowing from our taps, quenching our thirst, and keeping our gardens green. But have you ever considered the process that brings this vital resource to your home? Water well drilling is an intricate dance of science and skill, designed to tap into hidden aquifers lying beneath our feet. It’s not just about digging a hole; it requires knowledge of geology, regulations, technique, and safety. With so many details to navigate, understanding water well drilling can make all the difference in ensuring you have a reliable supply of clean water whenever you need it. In this comprehensive guide, we’ll explore the services, techniques, and considerations that define the well-drilling journey. So grab a cup of water (if only by magic!) and let’s dive into the fascinating world beneath the surface.
Water well drilling is the process of creating a borehole in the ground to access groundwater, which involves using specialized drilling equipment and techniques. The procedure typically includes site assessment, drilling, casing installation, and testing the well for water quality and yield, ensuring a reliable source of water for residential or agricultural needs. At Stevens Drilling, we provide expert services to guide you through every step of this essential process.
Drilling Water Wells: An Overview
Drilling water wells is not merely about creating a hole in the ground; it’s an intricate process requiring attention to detail and expertise. The journey to reach that life-sustaining aquifer begins with what is known as a site assessment. This preliminary step is crucial—it involves geological surveys to gather data on soil composition, rock formations, and overall water availability. In essence, this helps pinpoint where the highest chances of successfully striking water lie. Imagine it’s like looking for buried treasure; without a good map or a well-thought-out strategy, you’re unlikely to discover anything but disappointment.
Once the site assessment is complete and promising water sources have been identified, it’s time to navigate the regulatory landscape. Securing necessary permits from local authorities is essential, as these regulations can vary significantly from region to region. This part of the process emphasizes the importance of compliance; without following the legal guidelines, your well may face unnecessary delays and even potential fines. Think of it as laying down the groundwork for a home—without a strong foundation, everything else built on top is at risk.
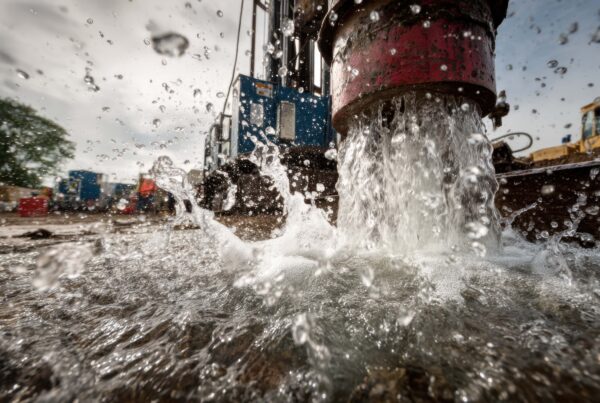
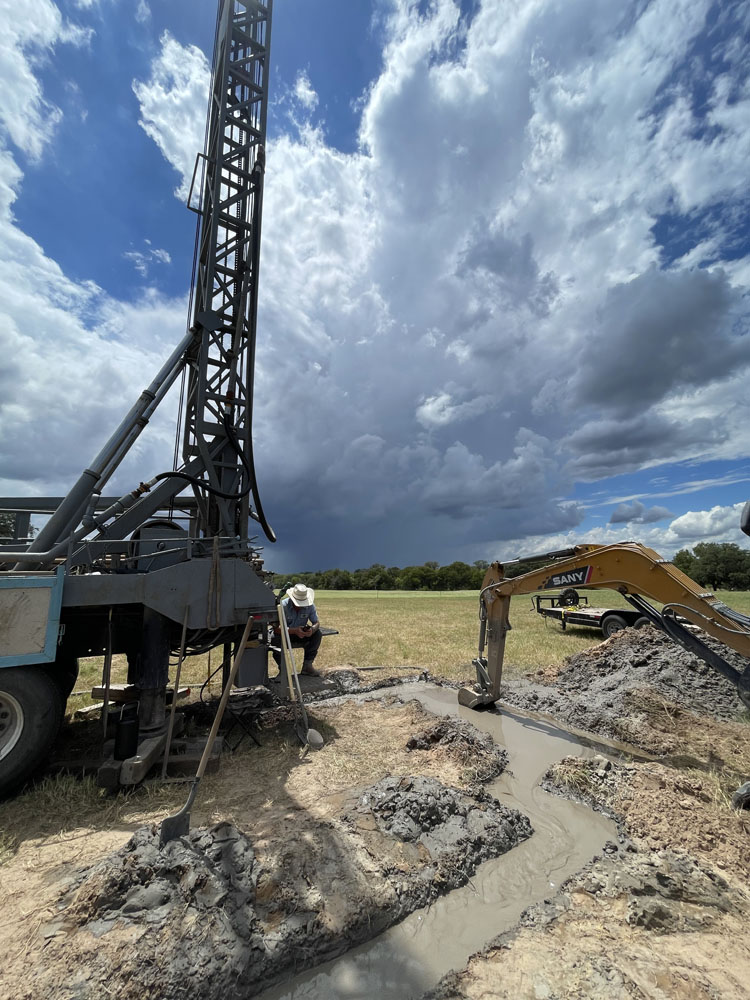
With permits in hand, we move onto one of the most critical phases: drilling. This involves boring deep into the earth until that precious aquifer is reached. Depending on various geological conditions, such as soil makeup and rock hardness, different techniques and equipment will be employed. For example, some areas may require rotary drilling while others might utilize cable tool drilling. A skilled team knows which method to use based on their experience—after all, they’re essentially navigating nature’s many layers.
However, reaching the aquifer is only half the battle; ensuring its integrity and safety comes next.
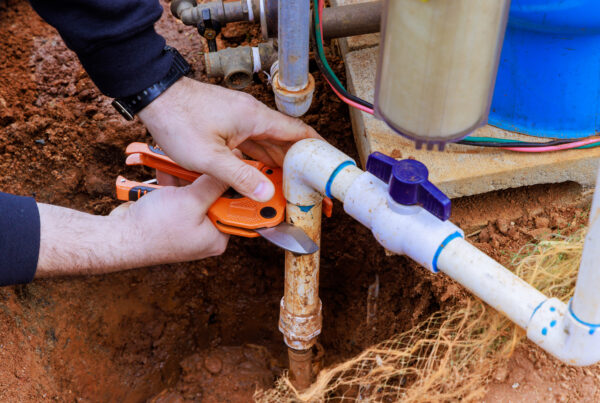
As we transition from drilling to installation, one of the pivotal steps is casing installation. Here, a casing made from durable materials is placed into the drilled hole. This serves two main purposes: it prevents the well from collapsing over time and acts as a barrier against surface contaminants that could compromise water quality. The importance of this step cannot be overstated; without proper casing, your well could become useless due to structural failure or pollution.
Following casing installation is grouting, wherein grout is applied to seal any gaps between the casing and the borehole wall. This step solidifies protection against contaminants like bacteria or chemicals seeping in from above ground—a necessary safeguard for maintaining clean drinking water. Think of grouting as applying mortar to bricks; it fills in gaps and stabilizes everything around it.
After securing your well with casing and grout, it’s time for development and pump installation. Developing the well entails flushing out any debris or fine particles that may have settled after drilling. This ensures optimal water flow and quality when you start drawing water from your well. Finally, appropriate pumps are installed based on specifics like depth and the volume of water required. Selecting the right pump is akin to picking an engine for your car—you need one that meets your specific needs efficiently.
Understanding these critical steps highlights their significance in accessing clean water effectively in rural and remote areas, paving the way for exploring various types of wells designed for different applications.
Types of Water Wells
Various types of water wells serve different needs and conditions, ensuring that everyone can find a solution tailored to their unique circumstances.
First up are shallow wells, which are typically less than 50 feet deep. These wells are perfect for areas with a high water table, providing quick access to groundwater without much hassle. Their installation is relatively easy and cost-effective, making them attractive options for homeowners looking to tap into local water sources. However, shallow wells are more susceptible to contamination from surface runoff or nearby agricultural activities, which could lead to some unwelcome surprises when you turn on the tap.
While shallow wells can be convenient, they aren’t always the best choice depending on your water quality needs.
Next in line are deep wells, which involve a more substantial investment upfront but pay off in the long run. Ranging from 100 to 1,000 feet deep, these wells reach deeper into the earth’s crust, allowing access to cleaner and more reliable water sources. Although drilling deep wells tends to be more expensive due to the advanced technology and equipment required, many homeowners find peace of mind knowing that they’re drawing water from aquifers that are less likely to be contaminated.
Artesian Wells
Another option worth considering is the artesian well. These wells tap into pressurized aquifers beneath the Earth’s surface. When tapped correctly, water naturally rises and flows out without the need for pumps. This feature not only saves energy but also provides a continuous source of clean water as long as the well is maintained properly.
Although artesian wells are less common compared to shallow and deep wells, their advantages in terms of maintenance ease and reduced operational costs can be highly beneficial in regions where geological conditions align favorably.
Choosing the right type of well begins by assessing your environment; an optimal location significantly impacts your water quality and yield. Each type has its own advantages and considerations that should guide your decision-making process. Next, we’ll explore how specific factors influence site selection for maximum efficiency in your water well project with professionals who understand the landscape.
Selecting the Right Location
Choosing the ideal well location requires a delicate balance of various factors that must be carefully considered. A fundamental aspect is the geological makeup of the site you choose. Groundwater flows through different types of soil and rock with varying ease; hence, having a clear understanding of this can discern your success or failure. Many professionals, including geologists, often rely on soil samples and rock cores to assess subsurface conditions. For instance, sandy soils tend to be more porous, which may indicate favorable water-bearing formations compared to dense clay soils that can trap water but may not allow it to flow easily.
In addition to soil type, it’s important to take into account the local water table levels. The water table is the upper surface of the zone of saturation and fluctuates based on seasonal weather changes and groundwater extraction rates. If you’re considering a location, a shallow water table may mean easier access to groundwater but raises concerns during drought periods when levels might drop significantly. Conversely, a deep-water table often necessitates extensive drilling but could provide a more stable source of water over time if it’s continually replenished.
Choosing wisely is paramount; placing a well too close to contaminants can pose significant health risks for years ahead.
Proximity to Potential Contaminants
When deciding on a well location, it is imperative to consider the proximity to potential contaminants. Ideally, wells should be situated at least 100 feet away from septic tanks, livestock areas, and industrial sites. This distance helps minimize contamination risks from harmful chemicals that can leach into the groundwater supply. Contaminants such as bacteria and nitrates from nearby septic systems can easily infiltrate water supplies without proper distance measures in place, thereby compromising your well’s safety and effectiveness.
When conducting an assessment for your well site, maintain an awareness of surrounding land use. If there are plans for construction nearby or if agricultural activities are prevalent in the vicinity, it would be wise to factor these influences into your decision-making process. You want peace of mind knowing that the quality of your water remains uncompromised by any external factors.
An appropriately chosen site enhances drilling techniques while ensuring optimal equipment use during installation. Thus, understanding the nuances involved will pave the way for exploring essential methods and tools involved in this critical process.
Techniques and Equipment
When embarking on a water well drilling project, it’s important to be familiar with the various techniques that can be employed based on the geological conditions present at the site.
Rotary Drilling
One of the most widely used techniques is rotary drilling. This method utilizes a rotating drill bit that cuts through soil and rock, making it highly adaptable for a variety of geological formations. The rotating motion of the drill allows for effective penetration, which is crucial when you’re dealing with tough materials like limestone or granite.
It’s particularly advantageous in areas where there might be shifting soils since it maintains stability as it drills deeper. Furthermore, when paired with the correct drilling mud, rotary drilling helps cool the bit and remove debris from the borehole, ensuring smoother operations.
Percussion Drilling
On the other hand, if you find yourself facing harder rock formations, percussion drilling becomes your go-to technique. This method employs a heavy drilling tool that repeatedly strikes the rock surface, effectively pulverizing it. Imagine using a hammer against concrete; this analogy gives you an idea of how percussion drilling operates.
By applying weight and force, this technique breaks through stubborn strata that rotary equipment may struggle to penetrate. Unlike rotary drilling which continuously cuts, percussion drilling relies on quick bursts of impact that can also help minimize vibrations in surrounding structures—a thoughtful aspect to consider when drilling close to inhabited areas.
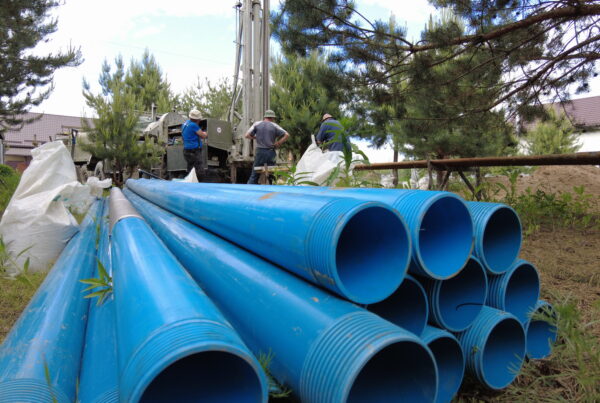
Equipment
Now that we’ve explored these methods, let’s look at some essential tools that make all this possible; after all, you can’t build a castle without your tools! Here’s a brief rundown of what you’ll encounter while drilling:
| Equipment | Use Case |
|---|---|
| Drill Rigs | Essential for either rotary or percussion drilling—think of them as the robust engines driving your drilling process. |
| Casing Tools | Used for inserting and securing well casing; they ensure that your well remains stable and reusable over time. |
| Grouting Equipment | Sealing the space around the casing is crucial for preventing contamination and ensuring long-term water quality. |
| Pumps | Once your well is completed, pumps are necessary to extract water efficiently, sustaining your supply for years to come. |
Selecting the right combination of technique and equipment tailored to your site’s specific needs isn’t merely about adherence to protocol; it plays a vital role in determining both efficiency and cost-effectiveness in your water well project. Subsequently, an exploration of financial aspects will further inform your approach.
Cost Considerations
On average, the cost to drill a water well can range anywhere from $5,000 to $15,000. However, this figure can fluctuate significantly based on various factors that are essential to consider. For instance, the depth of the well plays a pivotal role in determining the overall expense. Drilling deeper wells generally incurs higher costs as they require more time, specialized equipment, and skilled labor. Deeper wells often yield more reliable water sources, which can make that investment worthwhile.
Furthermore, geological challenges can create unexpected financial hurdles. If your location is characterized by hard rock formations or uneven terrains, these factors will likely impact drilling costs significantly. Different soil and rock conditions dictate what type of equipment is needed and how long the drilling process will take. Therefore, prior site assessments performed by professionals can save you both time and money in the long run by preparing for any potential complications before work begins.
It’s also imperative to account for permits and legal fees associated with drilling a water well. Depending on where you live, local regulations may require you to obtain certain permits before drilling can even commence. These bureaucratic steps not only add to the initial expenses but might also involve additional compliance costs during or after installation. Doing your homework here will ensure that you don’t encounter unexpected delays or fines later down the line.
While initial expenses can be high, proper maintenance plays an essential role in ensuring long-term cost efficiency. Regular servicing of your well can prevent costly repairs and prolong its lifespan significantly. This includes maintaining the pump system, testing water quality regularly, and monitoring for signs of sediment buildup or contamination.
“A proper investment in maintenance pays off when it comes to peace of mind and sustainability in your water supply.”
Understanding these cost considerations equips you with the knowledge needed to budget wisely for your water well project. By considering depth, geological challenges, permit fees, and committing to ongoing maintenance, you’re setting yourself up for success while securing a reliable source of water tailored to your needs.
As we explore further aspects of sustaining your water supply effectively, let’s shift our focus to the crucial practices that ensure your system remains efficient over time.
Maintenance and Upkeep
The importance of regular maintenance cannot be overstated; it ensures the longevity and functionality of a well. By being proactive, you can save yourself from hefty replacement costs while maintaining peace of mind regarding your water supply.
Routine Checks
One essential step in nurturing your well is conducting routine checks at least once a year—or more frequently if your water quality fluctuates or if you’ve had unusual weather. During these checks, look for signs of contamination, such as discoloration or an unusual odor indicating bacterial growth.
Additionally, pay attention to any mechanical issues. Inspect the pump for unusual noises or vibrations that might signal wear and tear. For visible components above ground, check for leaks or cracks that could jeopardize functionality. It’s wise to clean the well regularly to remove sediment and buildup affecting water purity and flow rate. Just like caring for a vehicle, an ounce of prevention can provide years of reliable performance.
Emergency Repairs
As one satisfied customer from Wilson County put it, “A timely intervention prevented what could have been a costly well replacement.” This highlights a crucial aspect: swift action on emerging issues can significantly reduce the risk of major problems later on.
Imagine waking up one morning to find no running water because your well has failed without warning—it’s not just inconvenient but profoundly impacts your daily life. The longer you wait to evaluate these signs, the worse the larger issue may become.
Whether it’s a malfunctioning pump or potential contamination from nearby environmental changes, addressing minor repair needs promptly can save you both time and money.
Staying proactive about maintenance will extend the life of your well and safeguard your investment, ensuring a stable supply of clean water for years ahead. Early detection is vital; regular inspections today lead to fewer worries tomorrow.
In conclusion, prioritizing maintenance not only protects your water source but also enhances the overall reliability of your well system. Remember, consistent care today provides peace of mind for tomorrow.