Water well drilling might sound like something only big farms or companies need, but it’s actually pretty important for many homeowners and businesses too. Having your own well means access to fresh water without relying entirely on city supplies, which can save money and give more control over water quality. But drilling a well isn’t as simple as sticking a pipe in the ground—it takes careful planning, the right tools, and some know-how about the earth beneath your feet. This guide breaks down everything you need to know about how wells are drilled, the gear involved, costs you can expect, and how to keep your well working smoothly for years.
Water well drilling is the process of creating a borehole deep into underground aquifers to access clean and reliable groundwater for residential, agricultural, or commercial use. This involves specialized equipment and techniques to penetrate various soil and rock layers, install casing and screens, and ensure sustainable water flow while meeting regulatory standards.
The Process of Water Well Drilling
It all begins with a thorough site survey conducted by expert geologists or hydrogeologists who study the land’s geology, soil composition, and water table depths. This isn’t just guesswork — it involves interpreting maps, soil samples, and sometimes historical well data to pick a spot where the chances of striking clean, abundant water are highest.
Skipping this step or rushing it can lead to drilling in dry or contaminated zones, which wastes time and money. Think of this as laying a solid foundation before building a house; proper planning sets the stage for a successful well.
2. Obtaining Permits
Next comes navigating the legal landscape—obtaining permits from local regulatory agencies. Because groundwater impacts entire communities and ecosystems, governments set strict rules to protect this valuable resource.
These permits often require submitting your site plans, environmental impact assessments, and proof that your drilling won’t infringe on neighbors’ water rights. While paperwork might feel tedious, it ensures your project complies with laws designed to safeguard public health and groundwater sustainability.
Being proactive here avoids costly fines or forced shutdowns later on.
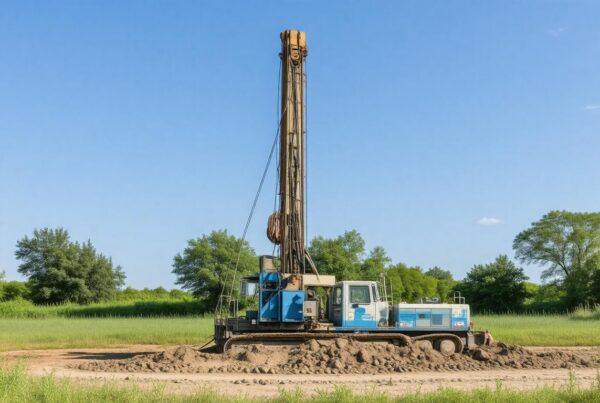
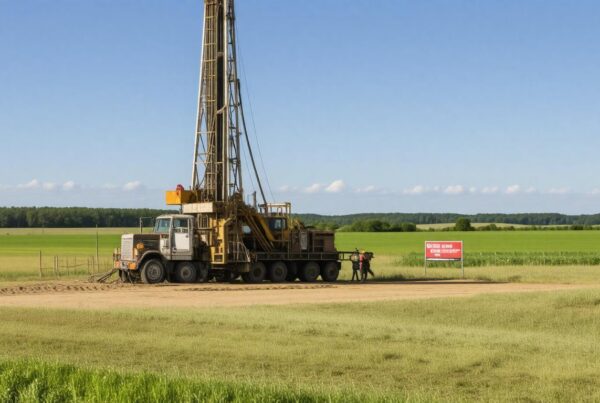
3. Mobilizing Drilling Rig
When permits are secured, the drilling rig is transported to the site. These machines vary widely: some are compact for shallow wells in soft soils; others are massive rigs capable of penetrating tough rock layers hundreds of feet deep. The choice depends largely on what the initial survey revealed.
Setting up the rig involves preparing access roads, clearing workspace, and ensuring power sources for machinery — all coordinated carefully to minimize disruption while maximizing efficiency.
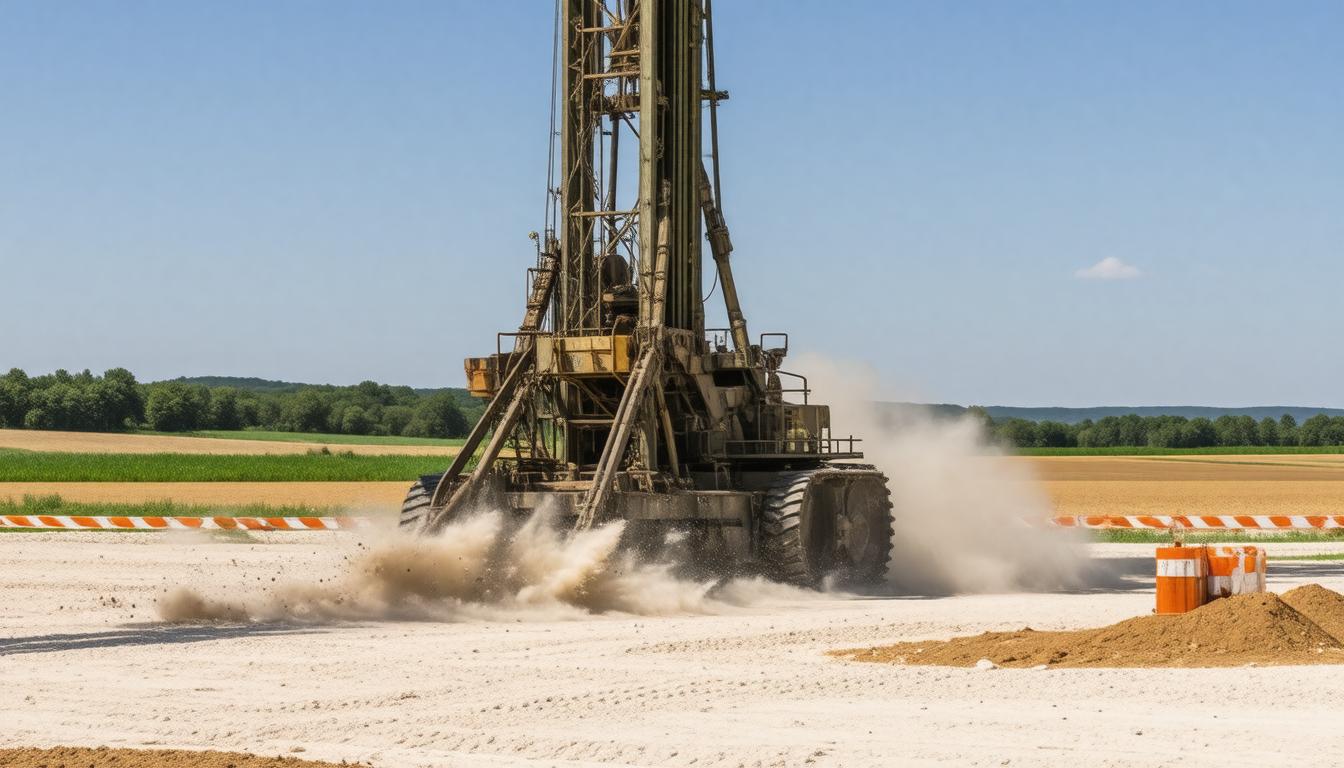
4. Drilling the Borehole
Here’s where the real work kicks in: drilling begins. Techniques like rotary drilling rapidly spin a bit at the borehole’s bottom grinding through earth and rock; percussion drilling hammers down using repeated blows into harder surfaces.
This part tests patience because conditions can change unexpectedly—encountering unexpected rock layers or groundwater that floods the hole requires adjustments in technique or equipment. Continuous monitoring allows drillers to respond swiftly, ensuring progress without compromising safety.
5. Installing the Casing
Once the borehole reaches its target depth — usually down to an aquifer—the next vital step is installing casing pipes inside it. This casing stabilizes the borehole walls preventing collapse and stops surface contaminants from entering the water supply.
Materials used depend on factors like cost, durability needed, and water chemistry; steel offers strength but can corrode over time, while PVC resists corrosion but may not suit all pressures or depths.
Properly securing casing seals the well’s integrity, safeguarding long-term performance.
After these foundational steps come specialized procedures that prepare the well for delivering clean water effectively and reliably.
6. Well Development
Simply drilling a hole doesn’t guarantee good water flow; fine particles loosened during drilling can clog screens or reduce yield. Well development works to clear out these sediments using techniques such as air-lifting where bursts of compressed air push out debris or pumping methods designed to flush contaminants away from intake zones.
This phase “awakens” the well—establishing pathways for water to enter freely while also improving clarity and quality.
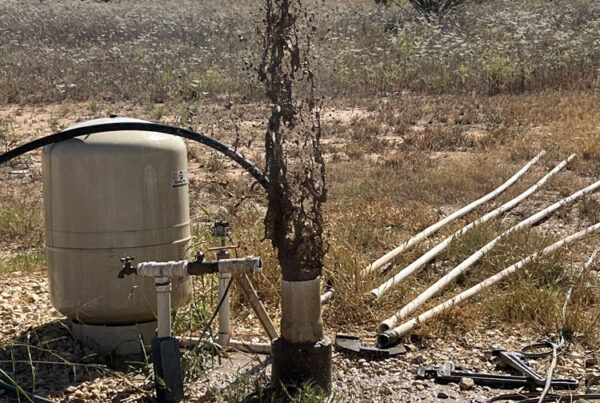
7. Pump Installation
With a clear, stable borehole ready, the final piece falls into place: installing a pump system tailored to your needs whether for household water supply, irrigation, or commercial use.
Pumps might be submersible units placed deep inside the well or suction pumps installed at surface level depending on depth and volume requirements. Alongside pumps come control panels managing operation cycles and protecting against faults like dry running or overloads—critical features that extend equipment life.
Recognizing each essential phase of this process helps underscore why expertise and reliable tools transform raw geology into dependable access to one of our most vital resources: clean water.
Essential Drilling Equipment
At the heart of any water well drilling operation are the drill bits and rods. Drill bits, such as tri-cone roller bits and PDC (polycrystalline diamond compact) bits, serve as the primary tools that break through earth and rock layers. Selecting the right bit depends heavily on the geological conditions beneath your feet.
The drill rods connect directly to these bits, transmitting power downward. Their length and material must match the expected depth and the demands of the terrain—longer rods crafted from durable steel are necessary for deeper wells, while shorter setups suffice for more accessible sites.
Choosing drill rods that balance flexibility with strength is vital. Too much rigidity can lead to damage when navigating uneven rock strata, whereas overly flexible rods might reduce drilling precision or risk breaking under pressure. This nuance makes it clear why professional insight during equipment selection is non-negotiable.
Drilling rigs are the engines driving the entire process. There are several types to consider: hydraulic rigs offer impressive power and smooth operation, especially suited for deeper or more challenging wells.
Conversely, cable-tool rigs adopt a simpler mechanism, making them more cost-effective for shallow wells but slower in operation.
Rotary rigs sit somewhere in between, offering versatility across various depths and soil compositions.
Understanding each rig’s best use case improves project planning significantly. For instance, hydraulic rigs demand skilled operators but can reduce overall drilling time—especially critical when working in tight schedules.
In contrast, cable-tool rigs may better fit budget constraints yet require patience for slower progression.
Mud pumps and tanks play an unsung yet indispensable role in maintaining drilling efficiency and equipment longevity. These pumps circulate drilling fluid—also known as “mud”—which cools down the drill bit to prevent overheating.
Equally important, this fluid lifts cuttings from deep within the borehole back to the surface, maintaining a clean drilling environment. Tanks or pits stationed nearby mix and store this fluid consistently throughout operations.
| Equipment | Purpose |
|---|---|
| Drill Bits | Breaking through rock layers |
| Drill Rods | Connecting bits; facilitating borehole depth |
| Drilling Rigs | Powering borehole creation via specialized methods |
| Mud Pumps | Circulating drilling fluid to cool bits & remove debris |
| Tanks/Pits | Storing and mixing drilling fluids |
Each piece of equipment complements the others; without quality drill bits, no rig can perform well. Without mud pumps, overheating and clogged boreholes would halt progress.
Recognizing this interdependence can help in planning purchases or rentals that suit both project demands and budget constraints.
Because every well differs—in purpose, depth, and geology—a solid grasp of equipment functionality greatly assists in selecting what gear suits your unique project conditions best.
Moving forward, it’s crucial to understand how these varying project needs influence decisions on well design and installation methods. This leads us naturally into exploring the diverse constructions that water wells can take shape as.
Types of Water Wells
Water wells come in several forms, each designed for distinct purposes and geological conditions. Recognizing these differences helps homeowners and businesses choose the best fit for their water needs while considering cost, depth, and water quality.
Dug Wells
Dug wells are among the oldest types of wells. Typically shallow—rarely exceeding 30 feet—they’re created by hand digging or with simple machinery. Their shallow nature means they tap into groundwater close to the surface, which is ideal where the water table is high.
However, this accessibility comes with risks: because they are open to surface contaminants, dug wells often require careful maintenance and thorough sealing to prevent health hazards. They are generally less expensive but not suitable for all locations or long-term use, especially in drier regions.
Driven Wells
Slightly more advanced than dug wells, driven wells involve forcing a pipe equipped with a screened end directly into soft soils like sand or gravel. This method is efficient for areas with loose or unconsolidated soil layers and serves well in residential settings needing modest water supply.
Driven wells usually reach depths of 30 to 50 feet and provide reasonable water flow, though their volume tends to be limited compared to deeper options. Their straightforward construction allows relatively quick installation and lower cost but may not sustain large agricultural or commercial demands.
Drilled Wells
For deep groundwater access and reliable yields, drilled wells dominate modern water sourcing. Using rotary drilling machines, these wells plunge hundreds to over a thousand feet below the surface, traversing diverse rock layers to reach stable aquifers.
The depth and precision involved mean drilled wells can offer substantial volumes of clean water year-round, even during droughts. While drilling costs are higher due to specialized equipment and labor, this investment pays off through longevity and consistent water quality.
Additionally, drilled wells allow installation of advanced casing and sealing techniques that protect against contamination better than shallower options.
Choosing your well type sets the stage for the next consideration—understanding how these options influence your overall expenses. This financial perspective shapes your approach when discussing drilling solutions with experts such as those at Stevens Drilling.
Drilling Costs Overview
Drilling costs are not a one-size-fits-all figure—they can swing quite a bit depending on a variety of factors that influence both the time and resources needed to complete the job. At the heart of the matter is the depth you need to reach water. Each additional foot adds materials like casing and pipe, plus more labor hours drilling through soil and rock, which naturally increases expenses.
Deeper wells also bring complications such as handling water pressure and ensuring structural integrity, which means better equipment or additional steps to guarantee safety—both of which add to your budget.
The nature of the ground you’re drilling through plays an equally important role. Soft sand or clay may let you drill faster with standard equipment, but harder rock formations require heavier machinery and more time. Sometimes drillers have to switch bits multiple times or use specialized tools for tougher geology. This isn’t just a small inconvenience; it can significantly boost your final cost because every hour on-site counts.
- Depth of Well: More depth means longer drilling time, extra materials, and higher labor costs.
- Geological Conditions: Rocky terrain demands stronger rigs and skillful operators, increasing expenses.
- Equipment Used: Modern rigs capable of tackling tough conditions are expensive to operate but often worth it for quality results.
- Permitting and Legal Fees: Local government rules can require permits or environmental assessments that come with fees.
Throughout the planning phase, understanding these elements will help you anticipate what your project might cost. According to current industry data, average drilling prices typically range between $15 to $30 per foot. For many homes relying on residential wells, this translates into about $3,000 to $15,000 in total. Of course, certain projects fall well outside this range if conditions become particularly challenging or if additional equipment is needed.
| Cost Factor | Typical Cost Impact |
|---|---|
| Depth per Foot | $15 – $30 |
| Geological Difficulty | Adds 10% to 50%+ depending on rock hardness |
| Equipment Premium | Varies; advanced rigs increase cost by ~20% |
| Permitting Fees | $100 – $500 depending on location |
Another hidden cost often overlooked is the permitting process. Some counties require extensive paperwork, inspections, and fees before any digging begins. While these can add upfront expenses, skipping proper approvals risks hefty fines or project delays—something no one wants at the tail end of a costly venture.
To avoid surprises, engage professionals early who understand local geological surveys and regulatory frameworks like Stevens Drilling does. Their expertise not only ensures compliance but can also optimize drilling techniques that keep costs reasonable while safeguarding water quality and well longevity.
With cost considerations clearly outlined, the next step is selecting the optimal site for your well—a decision that impacts both your investment’s efficiency and sustainability over time.
Location Selection Tips
Selecting the perfect spot for your water well is far more than just picking a convenient corner of your land. The location dramatically influences not only how much water you can draw but also its quality and the lifespan of your well. There’s a science behind it, and understanding that can save you time, money, and headaches down the line.
Soil and Rock Analysis
First off, take a close look beneath your feet—literally. The type of soil and rock under your property tells a story about water availability. Porous materials such as gravel, sand, and certain types of fractured rock act like natural sponges, allowing water to move freely and recharge.
If your site is dominated by dense clay or solid bedrock near the surface, it will be tougher—and often costlier—to drill a well that produces enough water.
Getting a professional to conduct permeability tests will give you concrete data about how easily water can flow through underground materials at your potential site. This isn’t guesswork; these tests help prevent drilling in dry or contaminated zones.
Stevens Drilling offers comprehensive geological assessments to guide clients toward optimal locations based on balanced cost-efficiency and water yield.
Proximity to Contaminants
Another critical factor involves what’s nearby—specifically, sources of contamination.
Septic tanks, livestock pens, chemical storage areas, and industrial sites all risk introducing bacteria or pollutants into your groundwater.
It’s important to maintain distance—experts often recommend at least 100 feet—as contaminants can migrate through soil and fractures over time.
Even if contamination isn’t visible on the surface now, future land use changes could pose risks later. That’s why selecting a location away from known or potential pollution sources protects the safety of your drinking water for years down the road.
Water Table Levels
Water tables aren’t static; they shift with seasons, rainfall patterns, and prolonged droughts.
Understanding these fluctuations is crucial in planning how deep your well should be drilled and when is best to start drilling operations.
Local geological surveys often track historic groundwater levels—these provide invaluable insight so wells can reach stable zones that won’t run dry during dry seasons.
Ignoring this information may mean ending up with an unreliable water supply that requires costly repairs or deeper re-drilling later.
A well-placed borehole in permeable soil away from contaminants with knowledge of seasonal water table behavior sets the foundation for steady, clean water access.
Once the ideal location is chosen based on these critical factors, safeguarding that investment becomes paramount. Protecting the quality and longevity of your water source depends largely on upkeep strategies and monitoring practices.
Well Maintenance and Water Quality
Keeping a water well in good working order isn’t just about preserving equipment—it’s fundamentally about protecting your water supply. A well that isn’t maintained regularly can quickly develop problems that impact both its lifespan and water quality. When you overlook simple upkeep tasks, small issues like rust or mineral buildup can evolve into serious malfunctions or contamination risks.
One essential habit to develop is scheduling annual inspections. These checks should carefully survey critical parts such as the casing, which prevents contaminants from seeping in, and the pump, which draws the water out efficiently. Corrosion or physical damage may not be obvious at first, but spotting them early can prevent costly repairs later on. Moreover, bacterial growth can sometimes occur without visual clues; regular inspection encourages proactive management before health hazards arise.
Alongside mechanical upkeep, monitoring water quality through routine testing is invaluable. Contaminants like coliform bacteria, nitrates, and heavy metals pose health risks if left unchecked. Testing your well water at least once a year ensures you catch changes before they become troublesome. If you notice anything unusual—like a strange taste, odor, or color—it’s wise to test more frequently. This vigilance keeps your water safe to drink and your family healthy.
When contamination does emerge, methods such as shock chlorination offer straightforward remedies. Shock chlorination involves introducing chlorine into the well system and circulating it thoroughly to kill bacteria and microorganisms that may have infiltrated the water supply. It’s a practice that balances simplicity with effectiveness, often restoring water quality without extensive repairs or system replacement.
The benefits of attentive maintenance ripple far beyond immediate conveniences; safeguarding your well’s functionality translates into long-term savings and peace of mind. A well-maintained well is an investment in reliable water access crucial for daily life, agriculture, or industry alike.
By maintaining these practices consistently, you extend the life of your system while ensuring your water remains as pure as possible — an outcome every property owner can appreciate.
For more comprehensive advice and expert services, be sure to explore resources at Stevens Drilling.
Consistent maintenance and vigilant water testing form the backbone of a safe and functional water well system. Prioritizing these efforts saves money over time and secures a dependable source of clean water for years to come.